
Like carefully polishing the rust off my newly discovered pottery tools! They were is a box in the workshop. Someone in our past gave them to us and now we know why. I made a painted cloth bag to keep them in! This is a sweet man......
 In case you think this pottery stuff is easy, that beautiful bowl on the top shelf left was done by The Master. Today we worked again on coiled pottery, trying to make the walls of the bowls arch inwards toward the center. The key is to have the bowl hardened a bit before additional coils are added to the rim. While waiting for my bowl to harden somewhat, I was able to add color to the " shard- like" pieces I created last week. Tomas had fired about half of them so they now have several colors of matte glaze as well as some shinier ones. This photo shows the fired pieces.....
 .......and this photo shows them with the glazes applied. You DO know that the colors you see here are in no way going to resemble the fired finished look, right?
 I also am experimenting by adding a small flat- sided glass orb to one of the bowls I completed earlier. It will be interesting to see what happens to that glass when the bowl is fired again. The experimentation is the part I most enjoy about learning new processes!
POST SCRIPT:
On our way into town this morning we were greeted by several of the horses at the ranch.
I also am experimenting by adding a small flat- sided glass orb to one of the bowls I completed earlier. It will be interesting to see what happens to that glass when the bowl is fired again. The experimentation is the part I most enjoy about learning new processes!
POST SCRIPT:
On our way into town this morning we were greeted by several of the horses at the ranch.  When we stopped to take photos they really seemed determined to get their heads in the window, presumably for treats? (I really have no idea what horse treats are). Check out that big ole horse eye in the rear view mirror!
  The low temperature last night was 14 degrees. It looks like a warm summer day doesn't it?
 And this is Roy.
 At the end of this road we turn left onto the real road which runs along the north side of our land.
 We continue this to the corner and turn left again, onto the road that runs along the west side of the land.
 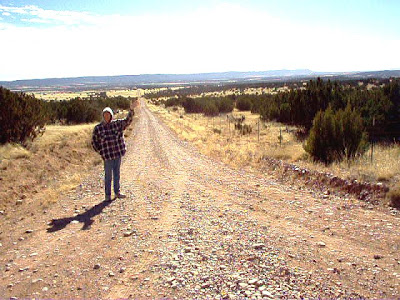 We continue down this slope and then turn left again, back onto the old ranch road. It is a bit of a strange triangle route we walk! Occasionally Roy stops to examine an unusual rock and we are ever on the lookout for that rare piece of pottery. They are few but we have found some. Since the grasses are tall in places, it is important to be on the lookout for small cactus that hide underneath, waiting to attack unsuspecting ankles. We have learned how to avoid most. This, is our afternoon walk. I hope you enjoyed it!
  He is a gem, always seems to find the answer when my brain is clogged up with other stuff. So, I printed off new cards, attached some painted fabric scraps to the backs and included some blue dots on the front (Tulip Pearl Dimensional Paint).
 The little card purse is closed with Velcro and has a decorative embellishment on the flap. Yes, the back side of an old watch face. How fun is that?
 The comb is dragged through wet paint and makes ridges. The chopstick is used to draw simple lines through the paint. I put some paint in the red plastic lid and use the now well worn sea sponge to create lace- like designs. That big wooden spoon continues to get bigger! I use it to scoop paint out of the cans and spread it around on the cloth. I wipe it off on the cloth, but not totally , so it continues to get fatter and fatter with paint. There is almost a giddy feeling when I use the spoon and leave paint on it! You know all those rules about cleaning your brushes and paint sticks and paint can rims? I DO clean my brushes, but the rest of the rules do NOT reside in my studio. And, no one is looking over my shoulder saying tsk, tsk, tsk. Really quite fun! As an aside to this reckless approach to paint, I now have a pair of "painting jeans". Yeah, they have paint on them and its great! The best tool in this picture is the yellow plaster trowel, which lost its handle long ago but is absolutely perfect for smearing around large globs of paint.
  Many of my paints are running low and getting a bit stiff and unusable for fine line painting. But, if I add some warm water and give it a good shake, it is perfect for dripping and pouring over the surface. These are some of the cans of house paint I am using as base colors.
  And, finally ........
 ...this is a stack of different colored pieces of painted fabric, hanging out there, waiting to be transformed into a handbag, or a tote, or maybe a piece of wall art, or an insert panel on the back of a jacket, or patches on a cool pair of jeans, or.........(you fill in the blank here) !! Now you know exactly how to do it. Go paint some fabric!
  And this is the Municipal Court and Police Department building, according to the signs over the front windows.
  What? You don't believe me? You bet your sweet cowboy boots! (and may it never change)
 The process was quite simple. I rolled out some clay using thin strips of wood on either side to get a constant thickness. Then, using some flexible rubber stamp sheets, I pressed them into the clay, again with the rolling pin. With a sharp tool I cut random shapes from the stamped clay.
  After gently smoothing the edges, I placed them on a board to dry. I wonder how much warping will happen when they dry? If they warp too much, I won't be able to get a good flat glue surface. Better hope for the best, huh. Does this mean I have to make 52 bags? Oh my.
 The best way to smear paint on a large surface is to pour it on and move it around with a plaster trowel. Each piece is about nine square feet.
  After it was dry I cut it in pieces and assembled this very cool wallet. The center of this tri-fold will hold credit cards and the bottom section is for bills. I also added some stamped images and stitched it all together with black thread.
  It is like carrying your very own piece of original art work!
  I have a tote bag in the making that I will show you in another post. I would like to think about creating a line of these funky and edgy accessories. I need some help naming the line. Do you have any suggestions? I came up with "The Gallery Collection" but seemed a little boring for such fun stuff!
 I have 2 pieces in the above photograph. The free form fish bowl in the upper right corner is mine, as well as the smaller bowl to the left of it with the contemporary design.
 There were about 8 of us in the class. We sat around a large canvas covered table and began to know clay. I liked the feel, the smoothness and the ease with which it could be manipulated. We started by making pinch pots, moved on to a small sculpture and then finished with seed pots. Here are some photos of our innocent and sincere beginnings. This is Scott's cantilevered wine goblet, leaning against a plastic tub in hopes of drying while still upright.

 This was my seat, with the ever present travel mug of coffee. Next Tuesday we will do more!
 I hand stitched each one in place and did some layering as well as some decorative embroidery. The hand stamp was also a scrap as it was done as a test piece for another project. Here are some closeup shots of some of the pieces and stitching. Those bright curvy strips are hems from the tee shirts I cut for rug weaving.


 This is the back of the rectangle of fabric showing my stitches. In addition to using up little scraps, I was also able to use those leftover pieces of embroidery floss, the ones we wind on cardboard for a future need. Now all my cardboard thread holders are empty!
 The bag lining was a piece of an old skirt I have had for years also.
  The Velcro strip was left over from another project. You see? The entire bag , in its individual pieces, could have easily ended up in the landfill. Instead, it has morphed into a colorful and roomy tote bag to hold all my stuff! It is large enough to carry my art journal and a current sewing project. Ahh.....tis good!

 This is a beginning photo after he drew the design on paper, attached the paper to the board and pounded a million tiny nails in.
 Here is an "in progress" photo showing how the curves take shape with the stringing of different colored threads.
  Here is the completed art piece. I think it is quite stunning! He incorporated beads, silver buttons and feathers left for us in the courtyard by our resident doves. When it is finally finished it will have a painted border and possibly a wood frame to show it off. I am in hopes he will continue making these! I love having another artist's work in the studio. The medium contrast is fun!


